Checkout Steps for WooCommerce
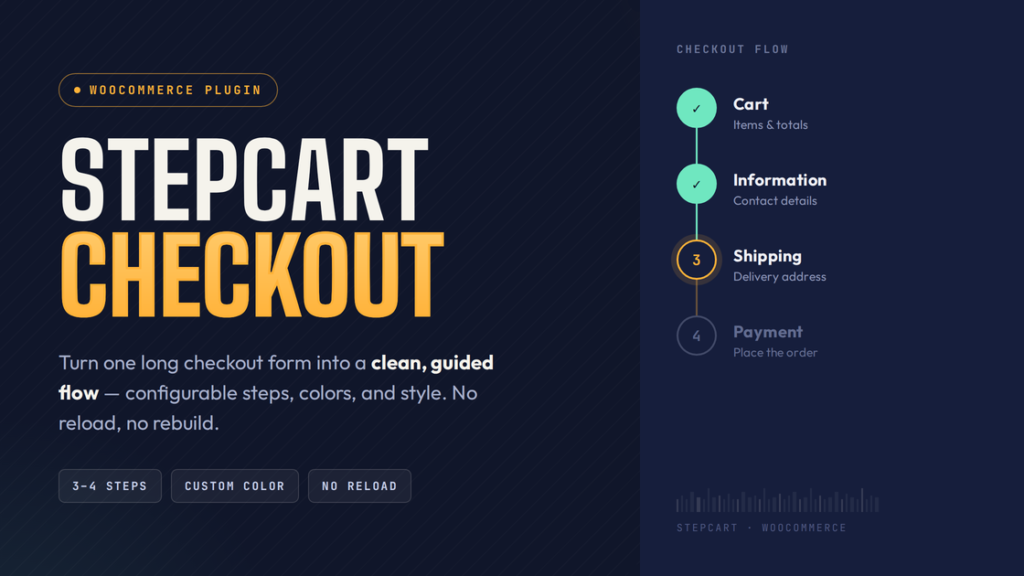
If you run a WooCommerce store, you already know the checkout page carries more weight than almost any other page on your site. It’s where browsers become buyers — or where they quietly close the tab. The default WooCommerce checkout puts every field on one long page: billing, shipping, order notes, shipping method, payment, all stacked on top of each other. For a store with a simple product line, that’s fine. For everyone else, it can feel like a wall of forms.
StepCart Checkout for WooCommerce is a lightweight plugin built to fix that, without touching a single line of your theme or rebuilding your checkout from scratch. It takes the checkout fields WooCommerce already renders and organizes them into a clean, numbered flow — Cart, Information, Shipping, and Payment — shown one step at a time on the same page, with no reload and no page builder required.
Here’s a full look at what it does and every feature packed into it.
Why a Multi-Step Checkout Helps
A single long form asks a customer to process everything at once: name, address, shipping preference, and card details, all competing for attention on one screen. Splitting that into clear steps does three things well:
- Reduces perceived effort. Customers see one focused task at a time instead of an intimidating wall of inputs.
- Catches mistakes earlier. Required fields are validated per step, so customers fix an issue right where it happened instead of scrolling back through a finished form.
- Builds momentum. A visible progress indicator shows customers exactly how close they are to finishing, which keeps them moving forward instead of abandoning halfway through.
None of that requires reinventing WooCommerce’s checkout logic — it just requires reorganizing what’s already there. That’s exactly the approach StepCart Checkout takes.
Core Features
1. Choose 3 or 4 Steps
From Settings → StepCart Checkout, you can pick between two flows:
- 3 steps: Information → Shipping → Payment
- 4 steps: Cart → Information → Shipping → Payment
The 4-step option adds a dedicated Cart step as the very first screen — a clean summary of the products, shipping cost, and order total, pulled directly from WooCommerce’s own order review table. It gives customers one last, uncluttered look at what they’re buying before they start filling in details.
2. Uses WooCommerce’s Real Fields — Nothing Is Rebuilt
This is the detail that matters most for compatibility. StepCart Checkout doesn’t replace WooCommerce’s billing fields, shipping fields, or payment section with custom markup. It takes the exact fields WooCommerce (and your other plugins) already render and groups them into steps using JavaScript and CSS.
That means:
- Custom checkout fields added by other plugins still show up correctly.
- Shipping methods, taxes, and payment gateways behave exactly as they do on a normal WooCommerce checkout.
- There’s no duplicate logic to keep in sync with WooCommerce core updates.
3. No Reload, Fully AJAX-Aware
Moving between steps happens instantly, without a page refresh. StepCart Checkout also listens for WooCommerce’s own update_order_review AJAX event — the one that fires when a customer changes their country, state, or shipping method — and keeps the step layout, totals, and Cart summary in sync automatically. Nothing breaks or resets when WooCommerce updates the order review in the background.
4. Per-Step Field Validation
Clicking Next checks the required fields that are visible in the current step before letting the customer move forward. If something’s missing, a clear inline message appears and the offending fields are highlighted — right where the customer is, not buried at the top of a long form after they’ve already scrolled past it.
5. A Customizable Accent Color
Every store has its own palette, so the step indicator shouldn’t be locked to one fixed color. StepCart Checkout adds a built-in WordPress color picker under its settings page, letting you set the accent color used for the active/completed step and the primary “Next” button — no CSS editing required.
6. Six Progress Bar Styles
Beyond color, you can also choose how the step indicator looks. StepCart Checkout ships with six distinct styles, so it can match anything from a minimal boutique storefront to a bold, high-contrast shop:
| Style | Description |
|---|---|
| Circles | Numbered circles connected by a line (the default) |
| Chevron | A connected arrow ribbon, each step flowing into the next |
| Minimal | Plain text labels with an underline — no circles at all |
| Progress Bar | A thick track with small dot markers |
| Dots | Small, compact dots with no numbers, ideal for a lighter touch |
| Boxes | Solid, numbered square blocks for a bolder look |
Switching styles takes one click in Settings — there’s no need to touch any code.
7. Responsive by Default
The step layout, navigation buttons, and progress indicator all adapt to smaller screens automatically, so the guided checkout experience holds up just as well on mobile as it does on desktop.
8. Built-In Settings Page — No Code Required
Everything above — step count, accent color, and progress bar style — lives in one place: Settings → StepCart Checkout. Store owners don’t need a developer on hand to adjust the checkout experience; every option is a dropdown, radio button, or color swatch away.
How It Works, Technically
For the curious (or the developers in the room): StepCart Checkout hooks into WooCommerce’s standard checkout template actions to insert a progress bar, then uses JavaScript to group the existing #customer_details, #order_review, and payment sections into labeled step containers. Navigation buttons are injected at the bottom of each step, and a lightweight validation pass runs before advancing. Because the plugin never overrides WooCommerce’s field rendering or checkout processing, it stays compatible with most shipping and payment extensions out of the box.
One honest caveat: if your theme uses a fully custom checkout builder — like the Elementor Pro checkout widget or the newer WooCommerce Blocks checkout — the step grouping may need extra adjustment, since those replace WooCommerce’s default checkout markup entirely. For the standard [woocommerce_checkout] shortcode checkout that most stores use, it works right out of the box.
Getting Started
- Install and activate WooCommerce (if it isn’t already).
- Upload and activate the StepCart Checkout for WooCommerce plugin.
- Go to Settings → StepCart Checkout.
- Choose 3 or 4 steps, pick an accent color, and select a progress bar style.
- Visit your checkout page — the new step flow appears automatically, no shortcode changes needed.
The Bottom Line
StepCart Checkout for WooCommerce isn’t trying to reinvent your checkout — it’s trying to make the one you already have easier to finish. By organizing existing WooCommerce fields into a guided, validated, visually consistent flow — and giving store owners real control over how it looks — it aims to reduce the friction that turns a browsing session into an abandoned cart, without asking you to rebuild anything or write a single line of code.
If a long checkout form has ever made you wonder how many customers give up halfway through, this is the kind of small, focused change worth testing on your own store.